Mitered Border Receiving Blanket
Bib and Burp Cloth
(with minky accents)
Beginning Binding
This is the handout I give at my class.


(pattern gives 2 sizes)

with matching pillow
Did you say you needed a quilt for someone, really fast?

These are so fun to make! If you do a Google image search, you'll find lots of variations.

Big Border Baby Quilt -- Finished Size: 42" X 57"
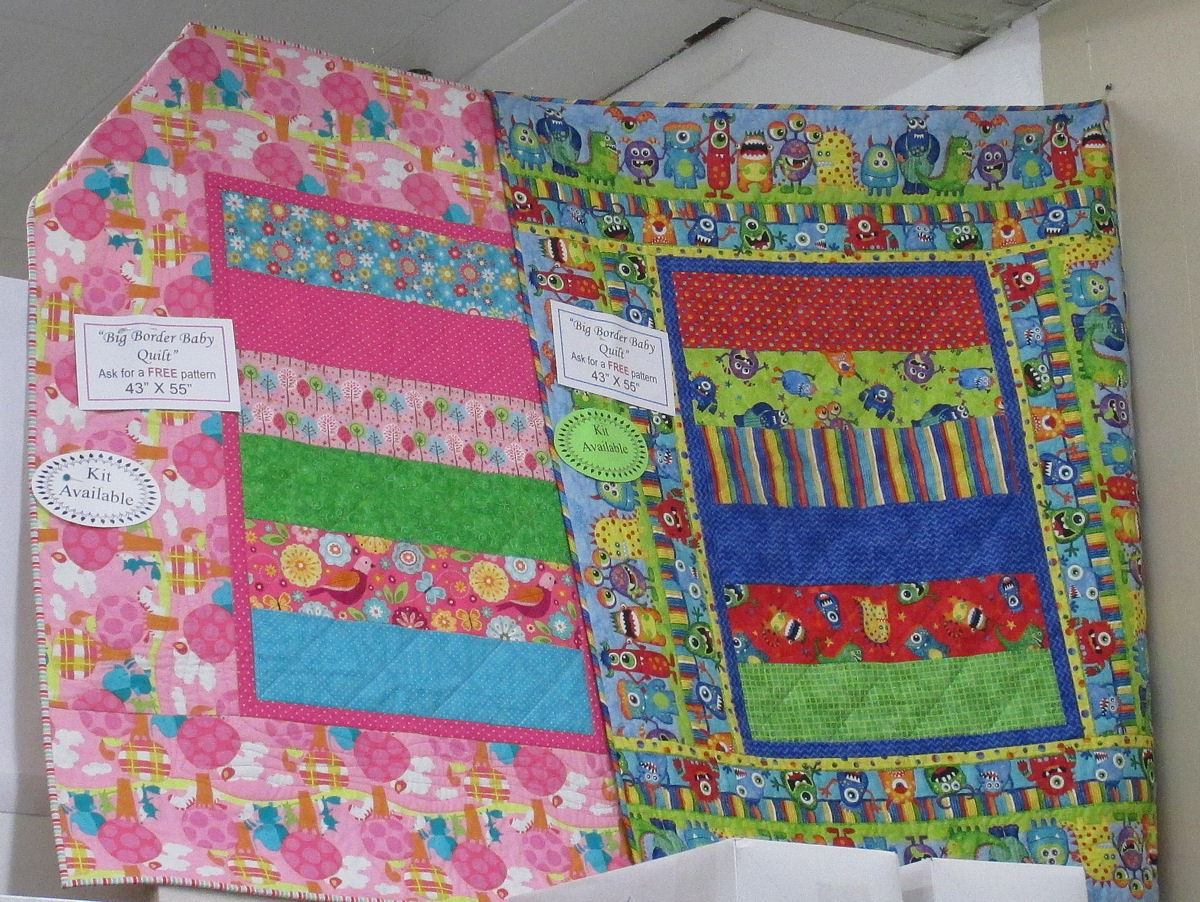
Those big border prints are so fun! But what can you do with them, right? Here's a great way to use them. Don't limit yourself to just baby prints. Wouldn't this look great with a Civil War reproduction border!
Materials:
· 1 1/4 to 1 1/3 yd outer border
· 6 strips 6” X 21” (center strips)
· 1/4 yd inner border
· 1/2 yd binding
· 1 2/3 yd (or 1 1/4 yd Shannon Cuddle) backing
Square-up your center strips to 5 1/2” X 20 1/2”. Arrange them in a pleasing sequence, and sew the rows together. Keep in mind which strip will be next to the inner border. Press seams open.
Cut 4 inner border strips 1 1/2” X WOF (Width Of Fabric). Sew the side
borders on first. Then sew the top and bottom borders on. Press towards inner border.
If you have a directional border print, you may want to “fussy-cut” the
borders. Cut the borders 8 1/2” to 10 1/2” wide X WOF. Work with the
design or “repeat” of the fabric as you cut the borders.
Sew the side borders on first. Then sew the top and bottom borders on. Press towards inner border.
Cut 6 binding strips
2 1/4” X WOF. (Or cut the whole piece into 2 1/4” bias strips.) Sew the
strips together with
diagonal seams.
Layer and quilt as desired.
Apply the binding with your favorite method.
Here's a diagram to help you visualize...

_______________________________________________
Rag Quilt Chart
This handy chart will help you figure out how much fabric to purchase when making a rag quilt.
Here's how it works:
1. Decide how big you want to make the quilt -- baby thru king size.
2. Decide how big you wan to cut your squares -- 6" thru 10".
3. The chart will tell you how many squares you'll need for the front, back or both.
4. Divide the number of squares needed by how many fabrics you'll be using.
5. Then figure out how much yardage to get by how many squares of each fabric is needed.

Here's an example:
1. I want to make a twin size.
2. I want to cut the squares 9".
3. The quilt will be 9 squares across X 11 rows. I'll need a total of 99 squares for the front and 99 squares for the back. (I may want to make the back all the same fabric.)
4. I have 8 fabrics. So 99 / (divided by) 8 = 12.375. So I would need 12 or 13 of each fabric.
5. If my fabric has 42" of usable width, I would divide 42" / 8" = 5.25. That means I need 6 strips that are 8" wide. 6 X 8 = 48" or 1 1/3 yd of 8 different fabrics. If I wanted the 8 fabrics on the back, too, I'd double that and get 2 2/3 yd.
No comments:
Post a Comment